FAQs & SUPPORT DOCUMENTS
HERE ARE SOME OF THE QUESTIONS WE GET ASKED MOST FREQUENTLY
| Message | Code | Meaning Instruction |
| 156 | Transverse tilt greater than +/- 10° | Hold the instrument without any transverse tilt |
| 162 | Calibration mistake | Make sure, the device is placed on a absolutely horizontal and flat surface. Repeat the calibration procedure. If the message still occurs, contact the dealer |
| 204 | Calculation error | Repeat measurements, make sure to follow the sequence according to the manual |
| 205 | Memory full | Delete memory |
| 220 | Hardware Error | If message continuously appears, contact the dealer for service |
| 224 | Hardware Error | If message continuously appears, contact the dealer for service |
| 240 | Data transfer error | Re-connect device with computer and repeat procedure |
| 245 | Data transfer error | Re-connect device with computer and repeat procedure |
| 252 | Temperature too high | Let device cool down |
| 253 | Temperature too low | Warm device up |
| 254 | Battery voltage too low for measurements | Change batteries |
| 255 | Received signal too weak, measuring time too long | Change target surface (e.g. white paper) |
| 257 | Too much background light | Shadow target area |
| 258 | Measuring outside of measuring range | Correct range |
| 260 | Laser beam interrupt | Repeat measurement |
| 284 | Laser defect | If message continuously appears, contact the dealer for service |
| 270 – 294 | Hardware Error | If message continuously appears, contact the dealer for service |
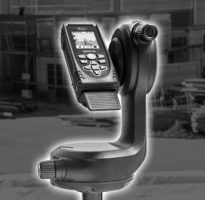
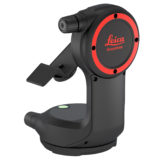
| 300 | Smart Base not folded out | Fold out Smart Base |
| 301 | Device was moved, levelling not valid anymore | Perform levelling again. Levelling with invalid levelling is possible but it affects the accuracy |
| 302 | “Point data transmission” is selected, but WLAN is off | Switch on WLAN |
| 303 | Error with Leica DST 360 adapter | Repeat measurement |
| 304 – 306 | Error with Leica DST 360 adapter | Repeat procedure. If message still occurs, contact your dealer. |
| 340 | WLAN: Data transfer error | Repeat procedure |
| 341 | Authentication error | Use correct password |
| > 1000 | Hardware Error | If message continuously appears, contact the dealer for service |
| 14041 | Smart Base defect | If message continuously appears, contact the dealer for service |
| Any other not listed code | If message continuously appears, contact the dealer for service |
All Leica DISTO and Leica Linos fulfil safety standards in this regard, specifically the IEC 60825-1 Class 2.
Even so please take care not to look into the laser beam or use it to dazzle other people!
DISTOs in general need less or more battery power depending on usage and the model. DISTO devices with graphical display will use more power than other DISTOs. We therefore recommend that you use quality batteries from known brands. Li-Ion AA batteries are ideal (must be 1.5V per battery), these have tested well in performance with Leica DISTO. If these are not available, please use quality alkaline batteries from known brands. Many cheap or discounted batteries may perform less well which leading to a shorter usage time.
Ni-MH rechargeable batteries have a similar performance to Li-Iron batteries but also have the advantage of being rechargeable.
If you feel that the battery usage of your DISTO is exceptionally high, or if the batteries are empty after being left in the DISTO for just a few days without use, then please contact your dealer for advice!
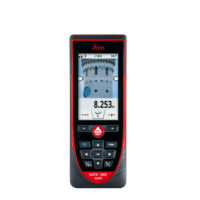
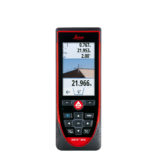
The Firmware on the DISTO D810 and S910 can be updated. The latest Firmware can be found by following these links:
D810
S910
If you experience problems installing the updater on your computer, or during installation (e.g. DISTO not found) please check your firewall settings or try on a different computer.
IMPORTANT NOTE: Please backup and save all your data on the DISTO D810 and S910 before doing an update. The data might get lost during this process. It is also recommended to do a device Reset (–> Settings) after the update.
On some computers, the photos are not completely downloaded. This can happen when the USB interface of the computer is not 100% compatible. Please try the download on another computer.
In some rare cases it might happen that a DISTO D810 or S910 cannot be switched off, or is unresponsive. In such case, press and hold the DISTO-key for about 20 – 30s until the DISTO is restarts. The DISTO should now operate normally.
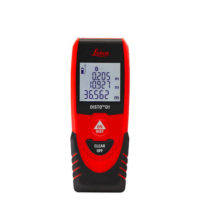
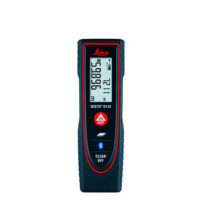
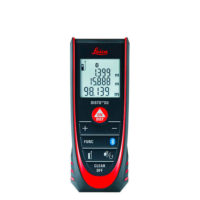
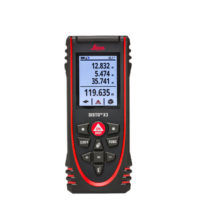
The latest Leica DISTO models use Bluetooth 4 (compatible with Bluetooth 5). This new standard is integrated into all current DISTO models being D1, D110. D2, X3, X4, D510, D810 and S910. Older DISTOs either have no integrated Bluetooth or are using Bluetooth 2.1 which is not compatible with the latest Apps.
The first measured point is the reference for the drawing. The second point defines the x-axis. The y-axis and z-axis are rectangular to it also referenced to the horizontal plane (levelling). An exception to this would be if the horizontal distance between the first and second measured point is less than 10cm. In such case the DISTO itself will be the reference in the drawing and the direction to the first measured point will be the x-axis. Here no 2DW file for the wall will be created since this would be not correct!
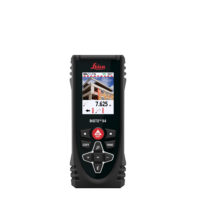
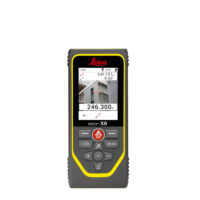
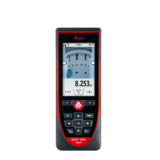
Since the laser exit is not in the same axis as the camera there will be a so-called parallax error. This means that on short distances the laser dot deviates from the hair cross on the display. The S910 and the X4 uses software which detects the laser dot and corrects the hair cross on the display accordingly. This also works in conditions with strong ambient light where the laser dot is not visible to the naked eye and ensures the user is measuring to the laser dot independent of any parallax error.
Such a correction is not done for DISTO X3, D510, D810 and prior models.
Please note following points:
- If you do not receive a confirmation email check your spam folder
- Keep the confirmation email together with your receipt for any warranty case
- It is not possible to change any data after registration
- The confirmation letter is proof of registration.
Please try following steps:
Please follow these instructions before sending your DISTO in for service or replacement:
- check if a message code appears in normal conditions (normal backlight, proper target quality, adequate distance)
- switch device off and on
- replace batteries with new ones
- use good quality alkaline batteries, Lithium metal batteries or quality rechargeable batteries
- make sure rechargeable batteries are properly charged
- in case of replaceable batteries take them out for 30s and put them in again
If you are looking for spares for your Leica DISTO or Lino please contact us by email or call us on 0800 292 2188 to discuss your requirements.
Software development kits (SDK or API) are available for Windows 10, Android and iOS. A registration on our partner network is required:
https://portext.leica-geosystems.com/zlgs/wda/register?GPN=X#
Check the manual for more information:
https://shop.leica-geosystems.com/global/disto-manuals-and-support-documents
Check YouTube for product videos:
https://www.youtube.com/channel/UCePfwPGSCQUNrtHio2QT-3A
Some Leica DISTO models are provide a “keyboard mode”. This means a DISTO can send a measured value displayed on the device, to a cursor position of any software or app – as you would type them on the keyboard. This special mode is available on the DISTO X3, X4, D810 and S910.
How does it work? First, you need to connect your computer, tablet or smartphone with iOS, Android or Windows via Bluetooth with your Leica DISTO. You can do this using the Bluetooth manager on your computer device. For these devices the DISTO will be considered as a keyboard.
After this, you will have to decide in which way you want to transfer the values from the DISTO to your computer device. This has to be done in the Settings of your Leica DISTO.
You can set the following:
- Autosend: Do you want that each measurement is sent automatically right after measuring or manually by click of a button at any time (Autosend off)
- Units on/off: Do you want a measurement value only or also the unit like “m” or”in”? This is important when using with Excel because if you want to send it to a template where you will do some caculations then you should not send the units. Otherwise Excel would consider this as a text-format where no calculations are possible
- Point or comma: This depends on the region you are in. Some regions are using a comma for decimal, some are using a dot. This is a setting you might have to change only once depending on your region
- Navigation on/off: this is important when using with Excel. If you activate this you easily can switch the arrow keys of the DISTO device on for moving between cells. This is useful to select another cell on your spreadsheet where you want to send the value in
- Terminator setting: here you can choose what the DISTO should send after the transferred value. Shall it send a “enter” (would jump to the next row when using in Excel), a “tab” (in Excel you would jump to the next column) or nothing (in Excel the cursor will stay in the active cell)
So, there are many possibilities to choose for your desired behavior especially when using with an Excel template.
Please note: Because the tablet/smartphone will consider your DISTO device to be a keyboard, it may not display the keyboard in the touchscreen anymore.
You will have the following options:
- DISTO X3 and X4: press and hold the plus or minus key for about 2 seconds to switch the keyboard on the display on again
- DISTO D810 and S910: switch on the navigation and press and hold the +/- key for about 2 seconds to switch the keyboard on the display on.
To calibrate a product means to compare its measuring values against a reference. Calibration is needed to make sure the product is working correctly and with the required precision. There are different ways for doing such calibration:
- You can do a self-calibration. Use one or more known distances and measure with the DISTO™ about 10 times the same distance. Use the highest resolution of the DISTO in order to receive precise comparable results.
Please note: a tape or meter stick is not necessarily a precise and reliable reference. Use class I tapes or meter stick, otherwise such reference can have a deviation of up to 1.4mm at 2m distance already. Also make sure that the target is e.g. a target plate where the laser cannot penetrate the object and therefore shows higher deviation. - Consult any local authority that can offer a calibration certificate for distance measuring devices.
- Leica Geosystems is providing a new Calibration Certificate Silver for following products:
- DISTO D5
- DISTO D8
- DISTO D510
- DISTO D810
- DISTO S910
This certificate is issued by Leica Geosystems in Switzerland. Accordingly, such a measurement with logistics takes up to 4 weeks.
If this certificate is desired, please contact your dealer.
Please note: Leica Geosystems will not provide such service for any other Leica DISTO model. In such case please use one of the first options.
The Calibration Certificate Silver with measurement values issued by the Manufacturer corresponds to the Producer Inspection Certificate M in accordance with DIN 55 350 Part 18-4.2.2. This standard mainly describes the used systems for these standards but not the measuring procedure itself. The test equipment used is traceable to national standards or to recognised procedures. This is established by our Quality Management System, audited and certified to ISO 9001 by an independent national accreditation authority.
Please note: This certificate is not in accordance with ISO 17025. Such certificate is not available for our Leica DISTO products.
Note: Only Android 9 or newer is supported
Please try following actions:
- Android 9: Go to Settings (Android) > Apps > Scroll down to DISTO Plan App and select it > Scroll down to Permissions > Location, this must be switched on
Please note that in general the Location Service must be switched on on the device. If switched off go to Settings (Android) > Connections > Scroll down to Location > on. - Android 10 or higher:
Go to Settings (Android) > Apps > Scroll down to DISTO Plan App and select it > Scroll down to Permissions > Location, this should be switched “When using the App” or to «permanently on» if this is available. The option “When using the App” would in such case not be sufficient! (available setting depends on the implementation of Android for the corresponding device)
Please note that in general the Location Service must be switched on on the device. If switched off go to Settings (Android) > Connections > Scroll downto Location > on. - Connect to the device always from myDevices in the DISTO Plan App.
- Reset of the DISTO device (Note: data on the DISTO will get lost)
- Switch Mobile device off and on
- In the DISTO Plan App Settings > DISTO > make sure «Auto connect device» is disabled (off)
- Open Settings on the Android phone > Apps > DISTO Plan > Memory > Clear cache
Open Settings on the Android phone > Apps > Open menu in the upper right corner (three dots on top of each other) > Show system apps > Bluetooth > Press Force Stop, then Memory > Clear Cache
Please also watch the relevant video with a step-by-step instruction:
https://shop.leica-geosystems.com/blog/video/leica-disto-plan-how-connect-leica-disto-d810-touchs910-phonetablet
https://shop.leica-geosystems.com/blog/video/leica-disto-plan-how-connect-leica-disto-x3x4-android-phonetablet
https://shop.leica-geosystems.com/blog/video/leica-disto-plan-how-connect-leica-disto-s910-wifi-android-phonetablet
https://shop.leica-geosystems.com/blog/video/leica-disto-plan-how-connect-leica-disto-d510-phonetablet
https://shop.leica-geosystems.com/blog/video/leica-disto-plan-how-connect-leica-disto-d1d110d2-phonetablet
